Developer Reference Getting Started
This article is intended for developers getting to grips with ENCX. It doesn't actually feature much code - mainly how to install charts and a bit of background. After following this guide you can be ready to start integrating ENCX with your application. I'm following the most common path: developing with a .NET language and starting off with NOAA ENC charts. That may not be you so feel free to skip through.
To view charts (other a than handful of samples) you will need a license. Licenses are enforced using hardware or software dongles. To get a license - get in touch. See also the ENCX UDE license for a cost effective bulk licensing option.
USB Dongle
First install the ENCX software from the ENCX download page. Now plug the dongle into a USB socket on the PC and skip on to the Testing the Dongle section.
Software Dongle file
A software dongle is a file, normally sent out by email and it has to be copied into the correct location on your hard disk. The following commands will get it to end up in the right place:
xcopy dongle8.bin %ALLUSERSPROFILE%\chersoft\common\
Ths will normally translate to:
C:\ProgramData\Chersoft\common\
Testing the dongle
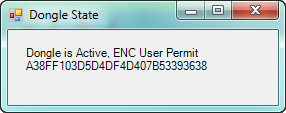
There's a built sample program that you can get from the start menu which can check that the dongle is working:
Start > All Programs > ENCX SDK > Samples > DotNetDongleMonitoringAfter several seconds this should report “Dongle is Active” (see picture).
NOAA Charts
NOAA provide a large amount of chart that is free to download and use. Installing these charts is often one of the first steps that developers go through when evaluating ENCX.
You don't need an ENCX license to install the NOAA charts. But you do need a license to view them. The only charts you can view without an ENCX license are the sample charts (in the senc_demo folder under Program Files.)
SENCs
Charts are installed into an ENCX specific folder structure. In the jargon of S-57 and ENC this is called the SENC. During the chart install the data is optimised for faster display. Normally a software package would just have one main SENC folder into which all the available charts are installed.
ENCX is designed to cope with a full chart portfolio in one SENC.
You might also have a separate SENC for the Chersoft World Vector Shoreline background.
Downloading NOAA charts
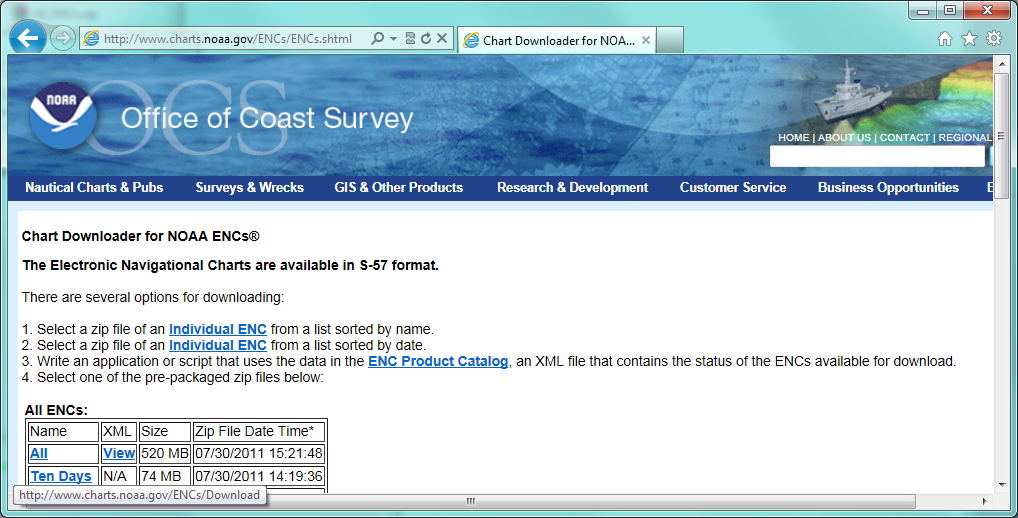
Go to the NOAA OCS web page at https://www.charts.noaa.gov/ENCs/ENCs.shtml
There are a lot of download options on this page. At this stage you probably don't want to be picking individual cells. I suggest picking either All or a particular state or coastguard region. Only problem with installing all the charts is that you have to wait during the download and then until the install has done. You might want to grab a coffee or something while that downloads.
ManageENC
ManageENC gives a UI for chart installation and updating. ManageENC also has an API to allow OEMs to put their own specific UI on the process.
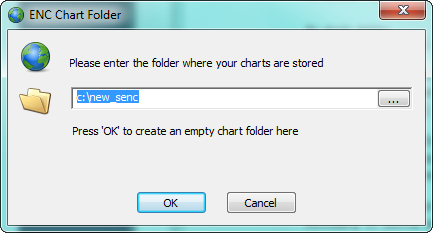
Start > All Programs > ENCX SDK > Chart Management > ManageENCThe first time around you will need to create a new, empty chart folder (SENC). So just enter a suitable path into the first dialog:
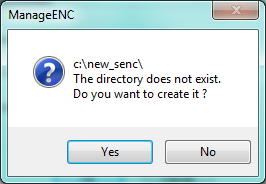
If you click OK you get prompted to confirm creation of a new chart folder:
An empty list of chart cells will be shown (after you have installed the NOAA data this list will be a very long one).
ENC chart data is made up of contiguous chart cells with 8 character names. It is banded into “navigational purposes” of varying detail (from overview to harbor).
Click Install Exchange Set...
![]()
NOAA supply their charts zipped up. No need to manually unzip them. ManageENC can do the heavy lifting. Choose Compressed Exchange Set and enter/copy the path to your downloaded file into there.
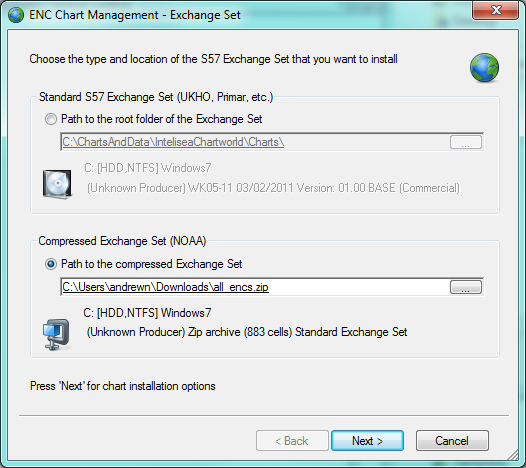
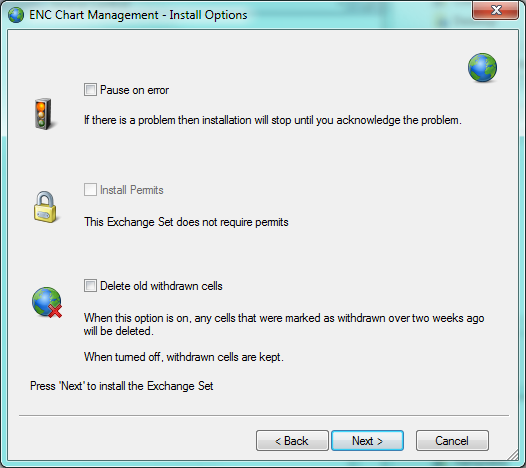
Hit Next twice and fast forward past the options page to start the install.
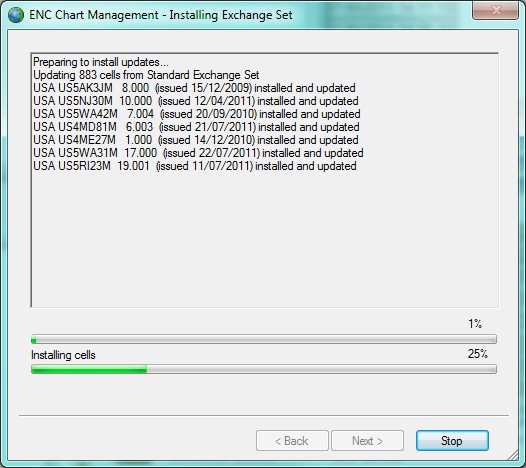
The full NOAA chart install will take some hours. The more powerful PC and with the more cores the better.
Eventually it will finish and you will want to look at some charts.
Adding the ENCXControls to the Visual Studio Toolbox
ENCXControls is a .NET project that wraps ENCX with a couple of WinForms controls, one for ENC charts and another for raster charts.
We supply the encxcontrols.dll ready to use. We also supply the source code so that you can adapt it to suit your own applications.
Here's how to get the controls into the Visual Studio Tolbox so that you can drag them onto your forms.
C++ programmers and people not using .NET unfortunately cannot take advantage of these controls.
1. Open Visual Studio without loading any project.
2. Make the toolbox visible (View > Toolbox)
3. Right click on the white space and choose "Add Tab"
4. Give the tab a name (e.g. "ENCX controls")
5. Right click on the tab and click "Choose items..." to get a complicated looking dialog with a number of tabs.
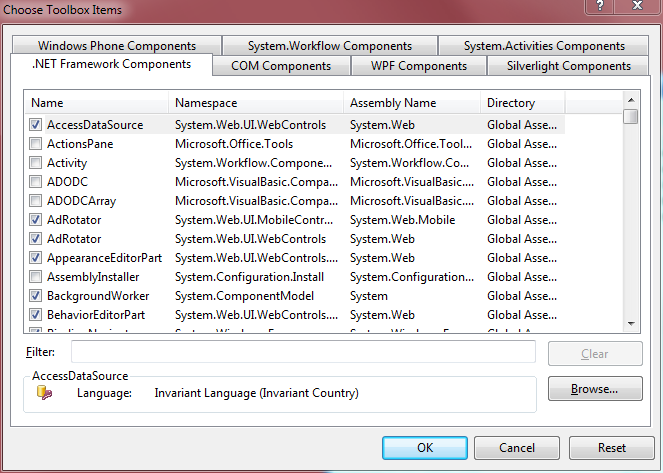
6. Click "Browse..." to get a file open dialog
7. Browse to your Program Files folder and into ENCX SDK\ENCX Controls\Bin\Release
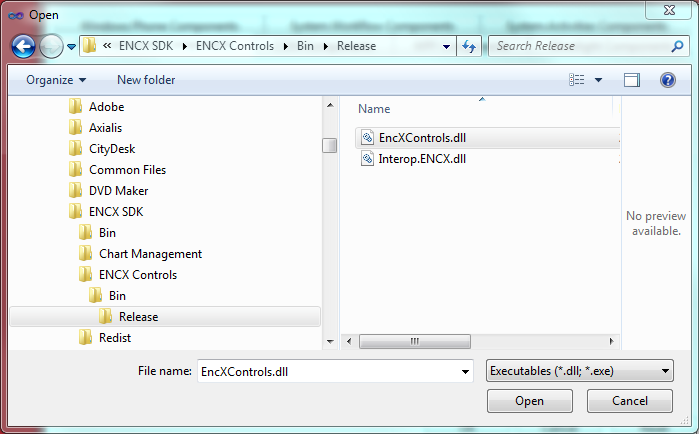
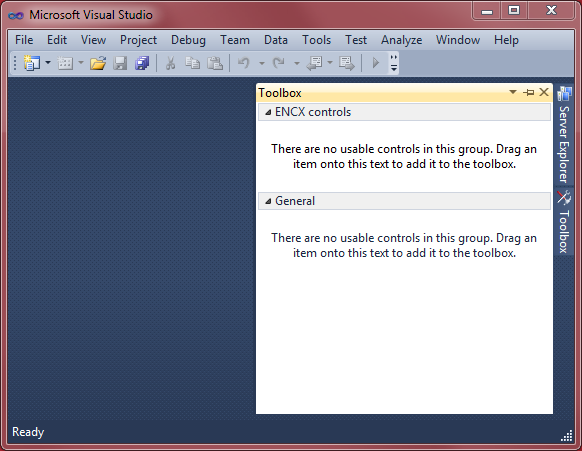
8. Double click on the EncXControls.dll file.
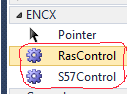
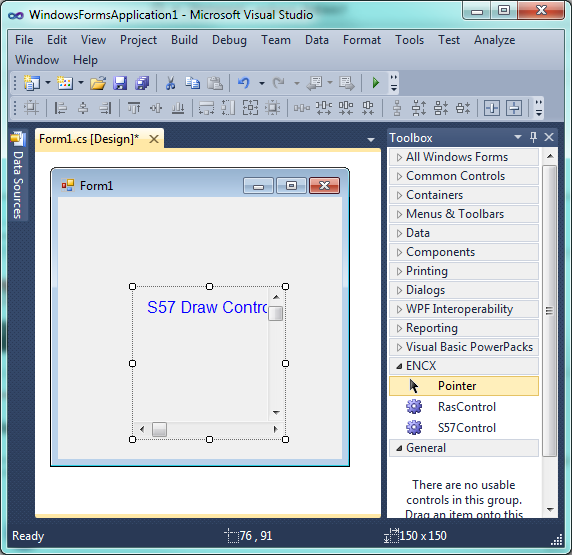
The tab will still look like it did above. Still saying that "There are no usable controls in this group...". Don't worry about that! When you create a new winforms application the controls will appear in the tab (see left)
Coding up the simplest C# ENC viewer
Ok, let's write some code to use those ENCXControls. The cool thing about the ENCX, the ENCX controls and the .NET platform is that you can write less than 20 lines of code and get an ENC chart viewer. We have gone with C# here because it is the most popular - If you want this in VB.NET then the EncView1 sample is very similar.
Fire up Visual Studio. Our screen shots are from VS2010 but everything is fairly similar for previous versions.
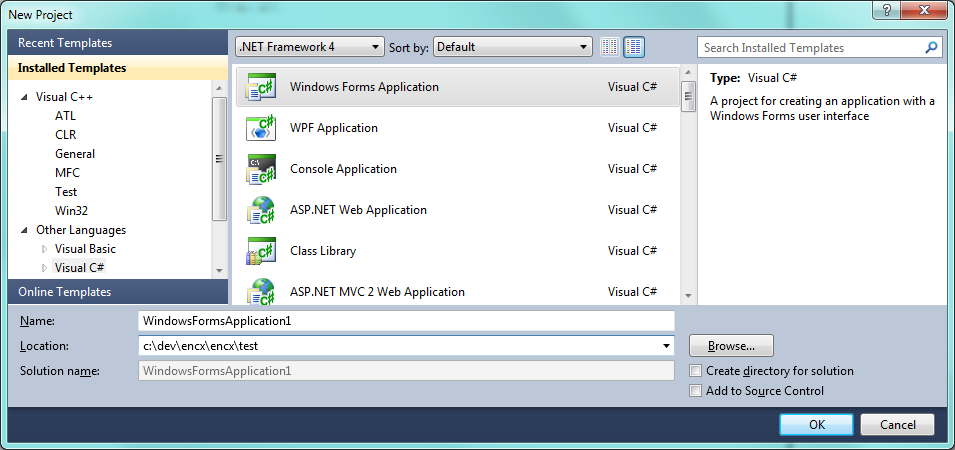
Create a new C# project - a Windows Forms Application:
Go to your new ENCX Controls tab and drag an S57Control onto your Form1 in design view:
Resize it so it fits your window and in its properties set the Anchor property to Top,Bottom,Left,Right and the AutoSizeMode to GrowAndShrink. Now you can resize your window and the control will resize with it.
Grab a copy of the Interop.ENCX.dll file supplied as part of the download (e.g. at C:\Program Files\ENCX SDK\ENCX Controls\Bin\Release) and put it in your project.
Next we need to add a reference to ENCX - right click on References in the solution explorer, choose Add Reference and Browse to pick the Interop.ENCX.dll
Now we can declare some variables at the top of our Form1 class.
public partial class Form1 : Form

{
    // all ENCX based applications need one of these
    ENCX.Library _encx = new ENCX.Library();

    // the S57Control will use this to draw the chart
    ENCX.S57Draw _draw = new ENCX.S57Draw();

    // allows us to register for changes to the dongle status
    ENCX.DongleObserver _dongleObserver = new ENCX.DongleObserver();

...
The Library class keeps track of the ENCX which is represented by its Dongle property. You need to keep one of these in your application if you are using ENCX. I think that the best policy is to create one as soon as possible.
We also need an S57Draw object which we will give to the S57Control to do the drawing with. If you are drawing S-57/ENC charts but not using a control then you would use an S57Draw object more directly.
We also need to keep an eye on the dongle. ENCX will not display charts until it has a valid license. It can take a few seconds for the licensing to fully initialize itself and this happens in the background. All we need to do is invalidate the S57Control whenever the dongle status changes. We will see that this takes hardly any code but we'll need a dongle observer object to do it.
You have created a bunch of ENCX objects and, because you have dragged a control onto the form, an S57Control object.
Right now the application should build and run. But not display any chart. You might need to copy the interop.encx.dll into the debug or release folder next to your .exe. To get some chart display we have to initialize ENCX and the S57Control a little more.
We can put the following code in the constructor of Form1 or the Form_Load handler if you like...
_encx.Construct("", "");
var senc = new ENCX.S57Manager();
var init = new ENCX.S57ManagerInitialisationData();
{
    SencPath = @"C:\noaasenc",
    ReadOnly = true // ReadOnly is simplest (more advanced ways are more functional)
};
senc.OpenSenc2(_encx, init);
_draw.SetManager(senc);
The first line initializes the ENCX Library object and then we create an S57Manager object to represent our chart folder. We open that folder as read only because this is the simplest way to open a chart folder.
We next choose a starting place and scale. I like Valdez in Alaska (nearly crashed into a river off a dirt road but lots of people stopped to help out, a different story). So, after the above code, put in...
var alaska = new ENCX.GeoPoint() { Lat = 61.112, Lon = -146.376 };
var cent = new ENCX.PixelPoint() { X = -1, Y = -1 }; // -1,-1 is shorthand for the center of the view
_draw.SetDisplayScale(50000, cent);
_draw.SetPosition(alaska, cent); // set the geo position of the center pixel of the display to 40.8N, 74.0W
To finish off we just need to make sure the chart is redrawn when the dongle status changes and set the control to use the S57Draw object.
_dongleObserver.Register(_encx.Dongle);
_dongleObserver.OnDongleChangeEvt += new ENCX._IDongleObserverEvents_OnDongleChangeEvtEventHandler(() => s57Control1.Invalidate());
s57Control1.Init(_draw, _encx.Dongle);
Now you should be able to build and run the application. This is about the simplest possible ENCX application.
Here are just a few more articles to check out...
Drawing on top of the ENCX controls
And more generally the Developer Reference section.
Please also get in touch and let me know how useful you found this article.